Smart Planning Tips for Affording Crawlspace Encapsulation Projects
Madison, United States - January 26, 2026 / Basement Repair Specialists LLC /
Have you considered crawlspace encapsulation for your home, but worry about the cost? Budgeting for this project can indeed be challenging, yet it’s not impossible. It’s about doing your homework on material costs, understanding the labor that’s involved, and getting numerous quotes. Surprisingly, the size and condition of your crawlspace could affect your budget more than you’d think. Plus, don’t forget to set aside funds for potential repairs and regular upkeep. By the end of this discussion, you’ll have a clearer understanding of how to budget efficiently for this home improvement task.
Key Takeaways
- Research the average costs of encapsulation materials, labor, and potential repairs for existing damage.
- Obtain multiple quotes from contractors to gauge fair pricing for your particular crawlspace size and condition.
- Prioritize funding for critical areas such as high-quality vapor barrier, dehumidifier, and insulation.
- Set aside a contingency fund for unforeseen expenses that may occur during the project.
- Consider long-term savings from improved energy efficiency when determining your budget.
Understanding Crawlspace Encapsulation
Diving into the world of home improvement, you might’ve stumbled upon the term “crawlspace encapsulation”. It’s a process that involves sealing your home’s crawlspace to prevent moisture, pests, and outside air from entering.
You see, a crawlspace is usually a shallow, unfinished area beneath your house, designed to provide access to plumbing and electrical systems. It’s a necessary part of your home, but it can also be a source of problems if not properly maintained.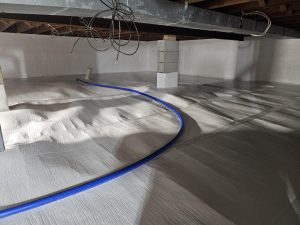
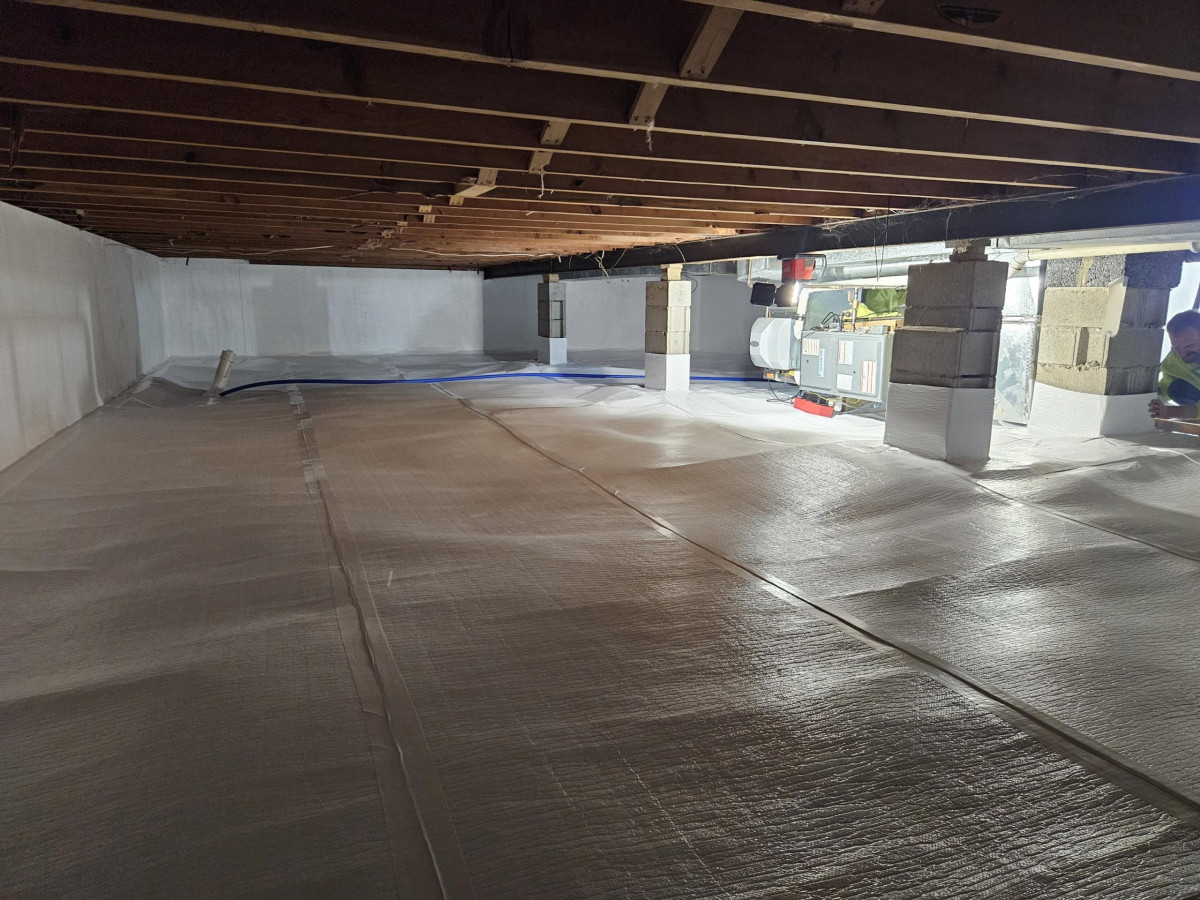
Encapsulation is the solution to these problems. It’s done by installing a heavy-duty polyethylene barrier to cover the crawlspace floor and walls. The barrier is then sealed with tape to create a moisture-proof environment. This prevents ground moisture from rising into your home, which can cause mould, mildew, and structural damage.
Additionally, encapsulation can improve your home’s energy efficiency. It prevents cool air from escaping during summer and warm air from escaping during winter. This means you’ll save on energy bills in the long run.
But before you get too excited, remember that encapsulation is a significant investment. It’s important to understand the process and its benefits before committing to it.
Estimating Encapsulation Costs
Before starting on a crawlspace encapsulation project, it’s crucial to get an idea of the potential costs involved. These expenses can vary based on several factors, including the size of your crawlspace, the condition it’s in, and the specific encapsulation method you choose.
First, let’s talk about size. As you’d expect, a larger crawlspace will cost more to encapsulate than a smaller one. This is simply because more materials will be needed, and it may take longer to complete the job.
Next, consider the condition of your crawlspace. If it’s in a poor state, requiring extensive cleaning or repairs before encapsulation, those additional tasks will increase the total cost.
However, if it’s in good shape, you’ll likely save some money.
Finally, the encapsulation method you select will also affect the price. Some methods are more labor-intensive and require pricier materials, which will bump up the cost.
Others might be less expensive but may not provide the same level of protection.
Identifying Necessary Materials
When it comes to encapsulating your crawlspace, knowing the necessary materials is key. You’ll want to make sure you’ve budgeted for all the essential components before you start the project. Without the right materials, you can’t achieve the desired results — a dry, mold-free, and energy-efficient crawlspace.
One of the primary materials you’ll need is a high-quality vapor barrier. This plastic or foil sheet will cover your crawlspace floor and walls, preventing moisture from seeping in. You’ll also need a dehumidifier to control humidity levels, preventing mold and mildew growth. In addition, you might need insulation for your crawlspace walls, and a sump pump if you have standing water issues.
Here’s a basic rundown of what you might need:
| Material | Purpose |
|---|---|
| Vapor Barrier | Prevents moisture |
| Dehumidifier | Controls humidity |
| Insulation | Provides thermal barrier |
| Sump Pump | Removes standing water |
Choosing a Reliable Contractor
Selecting the right contractor can make or break your crawlspace encapsulation project. It’s vital to find a professional who’s reliable, experienced, and knowledgeable.
The first step is to do some research. Look for contractors in your area who specialize in crawlspace encapsulation. Check out their websites, read reviews, and take note of their experience and certifications.
Once you’ve narrowed down your options, it’s time to reach out for estimates. Don’t settle for the first quote you get. It’s wise to get at least three estimates to make certain you’re getting a fair price.
Remember, the cheapest option isn’t always the best. You’re investing in the longevity of your home, so quality should be a top priority.
Lastly, communication is key. Your contractor should be willing to answer any questions you have and keep you updated throughout the process.
They should also provide a detailed contract outlining the scope of the work, materials used, and timeframe for completion. A reliable contractor will make the project much smoother and guarantee your crawlspace is well-protected.
Choose wisely, it’ll be worth it in the end.
Allocating Funds for the Project
Once you’ve chosen your contractor, it’s time to contemplate how you’re going to allocate funds for the project. Budgeting for crawlspace encapsulation, like any home improvement project, requires careful planning.
You’ve already done the hard part – selecting a reliable contractor. Now, it’s time to make some financial decisions.
First, determine how much you can afford to spend. It’s essential to be realistic about your financial capabilities. You don’t want to stress yourself with a project you can’t afford. Once you’ve determined your budget limit, stick to it.
Next, identify the costs. Get a detailed breakdown from your contractor. Make sure it includes all aspects of the project, from materials to labor costs. Don’t be shy about asking questions. You need to understand where your funds are going.
Finally, prioritize. While you might want the best of everything, it’s important to understand that you might’ve to make some compromises. Allocate more funds to areas that are vital to the project’s success and the longevity of your crawlspace.
Just remember, this isn’t about simply throwing money at a project. It’s about making smart, informed decisions to guarantee your crawlspace encapsulation is a success and within your budget.
Considering Unexpected Expenses
In the world of home improvement, there’s always the possibility of unexpected expenses cropping up. When budgeting for crawlspace encapsulation, it’s essential to factor in these potential costs. They might seem insignificant, but they can quickly add up, tipping your budget over the edge.
You could encounter issues such as moisture damage or pest infestations that weren’t apparent during the initial inspection. Remember, it’s better to plan for these surprises than to be caught off guard.
Here’s a table detailing some potential unexpected costs:
| Potential Issue | Estimated Cost |
|---|---|
| Moisture Damage Repair | $1,000 – $4,000 |
| Pest Control Services | $150 – $500 |
| Additional Insulation | $500 – $1,000 |
| Plumbing Repairs | $45 – $200 per hour |
| Electrical Repairs | $50 – $100 per hour |
You’re not guaranteed to face these issues, but it’s wise to prepare and have contingencies in place. By considering unexpected expenses, you’ll equip yourself to handle whatever comes your way during the crawlspace encapsulation process. You’ll have peace of mind knowing you’re financially prepared to tackle any hurdles that arise.
Maintaining Encapsulated Crawlspaces
Once you’ve encapsulated your crawlspace, it’s important to keep it in good condition.
You’ll need to know how to inspect it regularly, repair any damage, and employ preventive strategies.
Let’s explore these three key areas to make sure your investment stands the test of time.
Regular Crawlspace Inspection Tips
Regular maintenance of your encapsulated crawlspace is essential for keeping it in top shape. Don’t underestimate the importance of regular inspections. They’re key to catching minor issues before they escalate into costly repairs.
Start by scheduling your inspections. Aim for at least once a year, though twice is better – once in spring and again in fall. These seasons are when crawlspace issues are most likely to surface due to changes in humidity and temperature.
When you inspect, be thorough. Check for any signs of moisture, such as condensation on the insulation or plastic sheeting. Look for any mold or mildew growth. If found, it’s a clear sign of moisture intrusion.
Also, pay attention to the smell. A musty odor often indicates dampness or mold.
Inspect the insulation for any sagging or falling pieces. This could mean the encapsulation wasn’t installed properly.
Also, look at the vapor barrier. It should be intact and tight against the crawlspace walls and floor. Any tears, rips or loose areas can allow moisture to seep in.
 Repairing Encapsulation Damage
After your thorough inspection, you might find that your crawlspace encapsulation needs some repair work.
Don’t panic; just like any other part of your home, encapsulated crawlspaces can wear and tear over time. Your first step is to identify the type of damage. Is it a minor tear in the vapor barrier or a more significant issue like water intrusion or mold growth?
Once you’ve identified the problem, you’ll need to tackle it promptly. For small tears or gaps in the vapor barrier, you can use a special tape to seal them. It’s a quick fix that won’t break the bank.
On the other hand, if you’re dealing with water intrusion or mold, you’ll need professional help. Such issues can pose serious health risks and damage the structural integrity of your home.
Preventive Maintenance Strategies
To keep your encapsulated crawlspace in top shape, preventive maintenance is your best bet.
It’s not just about fixing problems as they arise, but taking proactive steps to prevent them from happening in the first place. This strategy isn’t only efficient but also helps you save money in the long run.
Here are four preventive maintenance strategies you can follow:
- Regular Inspections: Don’t wait for problems to show up. Instead, schedule regular inspections of your encapsulated crawlspace. This allows you to catch and address potential issues early.
- Cleanliness: Keep the area clean and free from debris. This helps prevent damage to the vapor barrier and other components of the encapsulation system.
- Climate Control: Monitor the humidity levels in your crawlspace. If it’s too high, it could lead to mold growth. Install a dehumidifier if necessary.
- Seal Checks: Regularly check the seals and barriers for any signs of damage or wear. If you spot any, repair them promptly to prevent moisture intrusion.
So, you’re ready to budget for crawlspace encapsulation. It’s about understanding the process, estimating costs, identifying materials, and choosing a reliable contractor. Remember to allocate funds appropriately and plan for unexpected expenses. Don’t forget, maintenance is key to ensuring long-term effectiveness. With careful planning and budgeting, you’ll be well on your way to a successful crawlspace encapsulation project. It’s an investment in your home’s health and your peace of mind.

Contact Information:
Basement Repair Specialists LLC
4230 E Towne Blvd
Madison, WI 53704
United States
Tom Trinko
(608) 886-2728
https://basementrepairspecialists.com/